Concrete garden sculptures
Homemade garden sculptures are made from plaster, polymer concrete, fiberglass (polystone) or concrete. They can be either monolithic or hollow. They are sold at almost every turn, but if you want, it’s not difficult to make a cat or Baba Yaga with your own hands. The manufacturing process involves casting a mixture of concrete with various additives into special molds with continuous compaction on a vibrating table. If this is not the case, the mold must be shaken to compact the mixture. In addition to the actual garden sculptures, the craftsmen themselves cast balusters, fence elements, wall panels, and tiles. The main disadvantage of this hobby is the serious investment at the stage of making the mold.
Mold for garden sculptures
The simplest figures are made by pouring concrete mixture into an elastic mold - silicone, latex, polyurethane, fiberglass on a metal frame. In forms with a complex texture, there is an insert made of non-shrink rubber inside. Forms are sold ready-made or made to order according to sketches. As a rule, two forms are made for one sculpture: for the front and back, which are subsequently connected. To ensure the strength of the connection, there are special protrusions on the surface that act as locks.
The final service life is determined by attitude and care. After each pour, the mold must be unmolded, washed, cleaned with a spatula, wiped with a rag, do not pour new solution over the remnants of the previous pour, so as not to damage small parts. Store in a dry, frost-free place. If you clean the mold after each pour, do not hit it or drop it, it will last more than 10 years.
Price issue. A mold with a non-shrinking rubber insert for fine texture costs about 40 thousand and can withstand 10 thousand castings. Cheap molds made of silicone and ABS plastic cost several times less, but they also withstand less filling.
Solution for making
The main raw materials for preparing the mixture are cement of a grade not lower than M400, water, sand with screenings of hard rocks of a 5 mm fraction, a plasticizer, and, if desired, resin and colored pigments.
As a rule, the proportion is as follows: 3 parts sand, 3 parts crushed stone, 2 parts cement.
The higher the grade of cement used for the mortar, the stronger the products will be.
The sand must be sieved to remove small debris from it. Water is poured into the mixture of dry ingredients little by little, stirring gently. The finished cement-sand mixture should be thick enough to hold its shape.
After filling the mold for the hollow figure, the internal space is stuffed with rags (preferably greased with something greasy - for easy removal). The displaced solution is removed. The rag is removed when the solution hardens slightly and holds its shape.
The use of a hyperplasticizer improves the quality of the concrete mixture, prevents the shapes from cracking, ensures rapid hardening and frost resistance, and minimizes the formation of bubbles during compaction. The cast mixture easily fills the mold and forms an even, smooth surface that does not require finishing.
Attention! Plasticizers reduce the setting time of cement.
Entry level
The simplest and most popular garden figure is a mushroom. For the mold, a plastic bottle will go under the leg; before pouring, place a reinforcement rod in the middle so that parts of the rod stick out from above and below. Cast a cap into any deep mold and insert several long nails.
Work in a shady area to prevent the concrete from cracking in the sun. The cement must dry so that it can be cut with a knife and make a recess for the leg (approximately 7-8 cm). When the solution has hardened, dig the leg of the sculpture into the soil and place the cap on the top of the rod. After 4-5 days, when the mushroom is completely dry, it can be painted.
Advanced level
Creating more complex figures (such as magical creatures with arms and legs) requires sculpting ability and spatial imagination. For strength, first install a frame made of thick wire or a welded one - from reinforcement rods. To prepare a hollow creature, the frame is wrapped in construction mesh. For large sculptures, a log wrapped in wire mesh can serve as a base. The solution is made from the same components as for casting, but in a ratio of 1:3, and diluted with water to the consistency of plasticine.
Beginners are advised to add PVA to the solution.- this will make it easier to correct errors. To create a monolith, concrete is laid with a spatula in layers, with incomplete drying between layers. First, the general contours are sculpted; after creating the required volume, small details (nose, lips, mouth) are worked out. The remaining cracks are filled with polyurethane foam.
You can paint, glaze, and varnish after about 10-12 days, when the concrete has finally set and dried.

Bringing it to mind
To paint garden sculptures, acrylic-based paints for outdoor use (facade) and stone varnishes are used. Each subsequent layer is applied only after the previous one has dried. In addition to paint and varnish, you can also use coatings that imitate stone rocks.
Work progress
Using the example of a garden lion. Dimensions: weight - 25 kg, height - 450 mm, length - 150 mm, width - 250 mm.
Clean the form from concrete mortar and store it.
Paint the lion with façade paint.
Sand any air bubbles and remove them with putty for façade work.
Products can be left outside for the winter, but in areas that accumulate moisture (in flowerpots, flowerpots, etc.) you need to make holes with a hammer drill so that cracks do not appear when the water freezes.
 Construction materials and list of works
 Proper insulation of a wooden ceiling in a private house
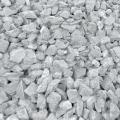 What types of crushed stone are there?