Waterproofing under tiles is an essential basis for a quality coating
Ceramic tiles are an excellent finishing material. A variety of textures, a wide color palette and excellent performance characteristics make it indispensable for finishing rooms, especially those where high humidity is possible: kitchens, bathrooms, toilets, etc. However, for all its advantages, the material has a slight drawback: grouted seams can allow moisture to pass through, which inevitably destroys the coating over time. Therefore, proper waterproofing under the tiles is necessary.
Waterproofing is a protective waterproof layer that prevents moisture from penetrating the base and causing the tiles to collapse. In addition, it guarantees the absence of unpleasant phenomena such as mold, mildew or unpleasant odors. Before laying tiles, it is recommended to carry out high-quality waterproofing of the base, regardless of whether it is a wall or a floor.
To protect against moisture, two types of materials are used:
- Pasting or roll. They are a coating based on polyester or fiberglass, impregnated with modified bitumen. They are distinguished by a rather labor-intensive installation process using a special burner or moisture-resistant adhesives. The strips are mounted in several layers, overlapping and carefully glued. It is very difficult to carry out the installation of roll coverings yourself, since the process requires certain experience and skills. In addition, the service life of such waterproofing is quite short.
- Coating materials represent a whole group of coatings that are united by ease of application: they can be “spread” onto the base using a brush, roller or spatula.
Coating waterproofing is carried out using a brush, spatula or roller in a room where the temperature was previously maintained at least +15 degrees and humidity no more than 60%
Depending on the basis, they are divided into:
- polymer;
- cement-polymer;
- bituminous.
It is worth noting that bituminous materials are considered the most inexpensive of waterproofing materials. However, there is no need to rush into purchasing. For all their fairly good performance characteristics, they have very significant “cons”. First of all, their installation involves the need to work with molten bitumen, which requires special skills and brings certain inconvenience. Another drawback: short service life. After five to six years, bitumen waterproofing must be renewed. In addition, when applying such materials to uneven or vertical surfaces, complete reliability of the coating cannot be guaranteed. And one more unpleasant surprise: the smell of bitumen remains in the room for a long time.
The optimal cost/quality ratio and fairly simple application combine cement-polymer mixtures. A waterproofing mixture of cement, polymer additives and dry mineral fillers has sufficient vapor permeability and resistance to water shock. However, there are some disadvantages here too. The waterproofing agent is available in the form of a dry powder, which is mixed with water before use. The prepared solution has a very limited time of use, which creates certain inconveniences. In addition, the water included in the solution creates additional unnecessary moisture on the base. The main disadvantage of cement-polymer waterproofing is its absolute non-plasticity.

One-component polymer coatings are considered the best option of all. They provide the most reliable and high-quality waterproofing. The coating is very flexible, durable and easy to apply to the base. Their only drawback is their higher cost than other materials. However, if you calculate the costs of more complex installation, maintenance, a fairly short service life and, accordingly, replacement of other coatings, it becomes clear that the high price of polymer mastics is fully compensated by their durability and high quality.
How to properly prepare the base
Before applying a protective waterproofing layer, it is necessary to carefully prepare the base. First of all, it needs to be dried very well and cleaned of all kinds of contaminants. If stains from oils, chemicals or paints are present, they can be removed using mild degreasers and detergents. Aggressive chemical cleaning methods cannot be used. Possible damage or surface unevenness is removed mechanically: by grinding or milling the base. You can use a stiff wire brush. After the work is completed, the surface is thoroughly cleaned again of dirt and dust.
If there are cracks, deep damage, seams or holes on the base, they must be repaired. In addition, experts recommend treating the joints of walls and ceilings, as well as all vertical wall joints. For this, a special sealant is used. You can begin subsequent work only after the material has completely dried. It will depend on the type of sealant; the hardening time of the joints can be found in the instructions for use.

Priming itself after application can act as a water barrier
After the material has dried, a primer is applied, that is, the base is primed. This operation is performed to improve adhesion to waterproofing materials. The primer is mixed well until a homogeneous mass is obtained and applied in a small layer to the base. Material consumption is calculated based on the density of the base. A coating with a lower density absorbs more primer, and accordingly, its consumption will be greater. After the material has dried, you can consider the base prepared and apply waterproofing.
Important: If there is dirt left on the base or it is of poor quality, priming cannot correct this.
Instructions for applying a waterproofing layer using the example of Hypersdermo polymer mastic
For optimal waterproofing, two or three layers of mastic will be required. Material consumption is 0.6 kg/m2, respectively, if the technology is strictly followed, it will increase to 1.2-1.8 kg/m2. Experts say that the highest quality waterproofing is provided by a three-layer coating, however, in order to save money, a two-layer coating is also acceptable.
Mastic is a viscous substance, so before applying it to a previously prepared base, the material is mixed for three to five minutes. To do this, use a low-speed drill, onto which a special spiral-shaped attachment is put on. As a result of mixing, the mastic becomes completely homogeneous.
The first layer is applied with a brush or roller. If preference is given to the second option, then choose a velor coating, since other materials are destroyed under the influence of mastic components. The coating is applied in a thin layer and left until completely dry. After six or eight hours, but no later than 24 hours after applying the mastic, you can begin working on the second layer of coating.

Contrasting colors of material are chosen for different layers of waterproofing
It is also applied manually with a brush or roller. Professionals advise using mastic of a contrasting color to apply the second layer, that is, one that will differ from the first. In this way it will be possible to control the quality of the coating. After drying, that is, after about six to eight hours, but no later than 24 hours after completion of work, the final third layer of coating is applied. It is also recommended to perform it with mastic of a contrasting color for better visual control.
It is worth considering that depending on the humidity and temperature in the room where waterproofing is carried out, the time for complete drying of the material can vary greatly. Therefore, before you start applying the next layer, you should definitely check the previous one “for tack.” If the mastic looks dry and does not stick to your fingers, you can begin applying the next layer of material.
Immediately after the last layer of mastic has been applied to the base, it is sprinkled with quartz sand, which must be dry. It is better to choose a fraction of 0.3-0.8 mm. This operation is performed to give the surface roughness, which will subsequently provide the best adhesion to adhesives. Sand is sprinkled on both horizontal and vertical bases. After the mastic has hardened, excess sand is removed with a brush. Before starting work on laying tiles, the freshly laid waterproofing is left for 24-48 hours for the material to fully polymerize.

High-quality waterproofing is the key to long service life of the tiles laid on it.
Laying tiles must begin with proper waterproofing of the base, otherwise the beautiful ceramic coating will not last long. Perhaps this important operation can be performed independently. However, if you have doubts about choosing a coating for waterproofing, or there is no experience in applying them, it is better to entrust the work to professionals. Then high-quality waterproofing for ceramic tiles will be ready in the shortest possible time.
 Construction materials and list of works
 Proper insulation of a wooden ceiling in a private house
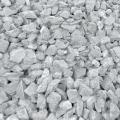 What types of crushed stone are there?