Small brick fireplaces. How to build a wood-burning brick fireplace with your own hands: a detailed description of the work
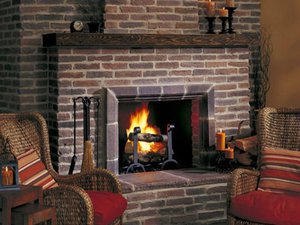
If the house has a fireplace, then the whole family gathers around it on cold autumn and winter evenings. The crackling of firewood and dancing flames create a unique atmosphere of calm and comfort. Unfortunately, building a real brick fireplace for a cottage, country house or a summer house is not cheap, so some home craftsmen prefer to do this work themselves. Of course, building wood-burning fireplaces with your own hands is not very easy, but if you follow the rules and show persistence, then everything will work out.
Calculation and diagram of a brick fireplace
The basic structure of the fireplace is as follows:
- firebox;
- smoke chamber;
- chimney.
Each of these parts has its own function. Wood is burned in the firebox, and gaseous combustion products are collected in the smoke chamber and discharged outside through the chimney. The dimensions of all these elements must be related to the area of the heated room.
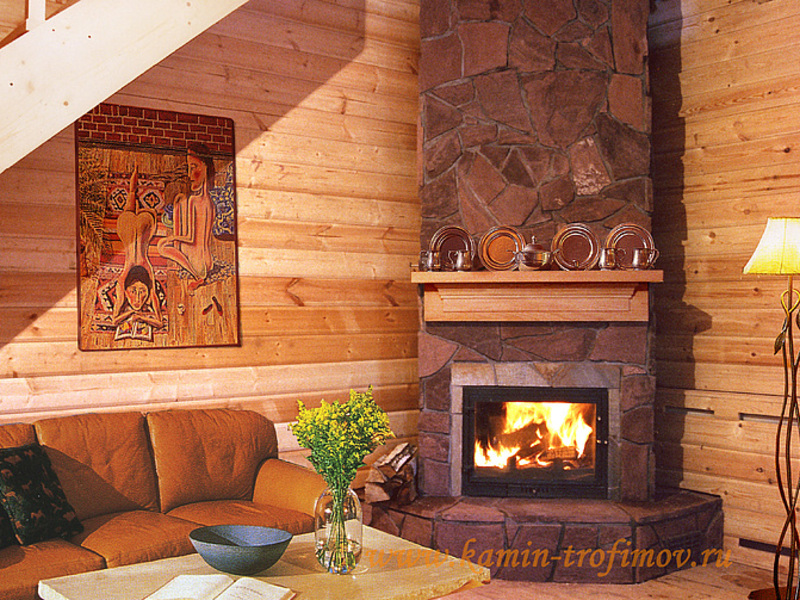
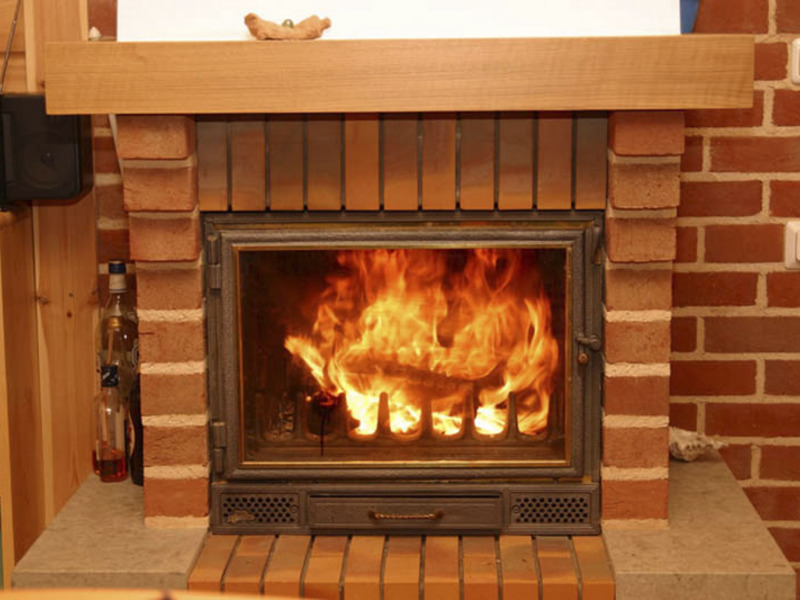
Brick fireplace with open hearth
To correctly calculate the size of the hearth, you need to know that the area of the firebox in relation to the area of the room is 1:50, while the ratio of height to width should be 2:3, and the ratio of firebox depth to height should be in the range of 1:2 up to 2:3.
Important! Dimensions must be observed. If, for example, you make the firebox too deep, the heat transfer will decrease, and a shallow firebox will cause smoke.
The dimensions of the smoke hole depend on the combustion area. To create required level draft, the cross-sectional area of the chimney pipe must be less area fireboxes by 8-15 times. If you plan to install a round pipe, then its cross-section may be smaller than that of a square or rectangular chimney.
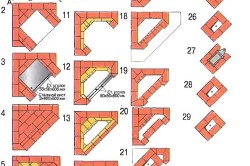
Drawings of the facade and section of the fireplace
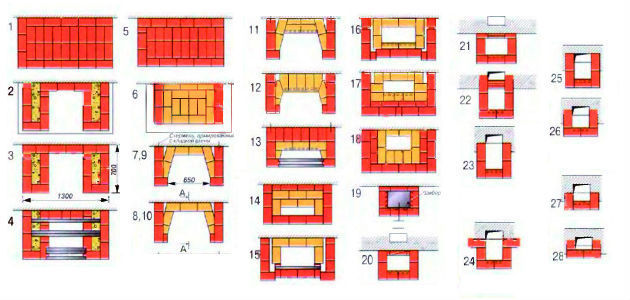
Having decided on the dimensions, you should make drawings of the facade and section of the fireplace. They will give an idea of appearance designs. It is also necessary to draw up diagrams of each row of masonry - ordering. In orders, it is necessary to number each row and use for each element symbols. The need for pre-processing of bricks is also taken into account, since quarters, halves, and bricks sawn off at an angle will be used.
Selection of building materials
The choice of building materials for your home needs to be approached very responsibly. We will need:
- Red solid fireclay brick. We carefully select and inspect each brick. Its color should be uniform and thick, and the corners should be free of chips. When hit by a hammer, a high-quality brick will produce a ringing, clear sound. It is also necessary to pay attention to the brick fracture - in low-quality brick it has a heterogeneous structure and color. We calculate the quantity of bricks according to the order drawings.
- Sand. Its grain size should be up to 1.5 mm. To remove dirt and debris, carefully sift the sand through a sieve and rinse in water.
- Clay. It is best to use Cambrian clay. If this is not possible, then you can take brown or dark red.
- Crushed stone. Fraction – 3-6 mm.
- Portland cement. Brand 300 is perfect.
- Smoke damper.
- Fireplace screen.
- Grate.

The fireplace is laid using clay mortar
DIY brick fireplace construction
Laying the foundation
We begin the construction of a home by laying a separate foundation:
- We dig a pit about 60 cm deep. Its width and length should be more sizes future foundation by 10 cm.
- We fill the bottom of the pit with crushed stone and compact it to ensure it is horizontal.
- We knock down formwork from wooden boards. For waterproofing, we cover it with roofing felt or treat it with resin.
- We install the formwork and fill it with broken bricks, stones, and crushed stone.
- Pour thoroughly mixed cement mortar (three parts sand to one part cement).
- We level the top of the foundation and check that it is horizontal.
- Cover the surface with film and let it sit for 7 days.
We make the foundation level below the floor level by 6 cm.
Preparation of materials for masonry
A few days before the start of masonry, we prepare a clay solution. To do this, soak the clay for 2-3 days, then filter it through a 4-5 mm metal mesh, mix it with dry sifted sand and add water. For one part of water there are 8 parts of sand, 4 parts of oily or 8 parts of lean clay. The consistency should be like thick sour cream. We check the quality this way: if the composition does not stick to your hands, holds its shape and does not fall apart, then everything was done correctly.
Before starting laying, immerse each brick in water for a minute to release air bubbles. If this is not done, the brick will draw moisture from the mortar, and the masonry will turn out to be fragile.
Features of fireplace masonry
- We lay waterproofing on the foundation in the form of two layers of roofing material.
- We calibrate the bricks.
- We start laying from the corners, constantly checking the level.
- We lay the bottom row of bricks on edge (to add originality), using cement mortar, and all subsequent rows - flat, using clay mortar.
- To lay outer continuous rows we use a trowel or trowel. We lay the smoke collector and firebox manually, which will help to detect small pebbles in the solution.

Important! We lay the smoke collector and firebox with special care, removing excess mortar with a damp cloth. It should be remembered that the walls are not plastered inside.
- The joints should be thin (about 5mm) to minimize future cracking.
- We spread the mortar in the middle of the brick so that it does not go beyond the edges.
- We bandage the seams half a brick in each row.
- We do not connect the firebox lining to the outer wall so that the masonry is not damaged due to temperature changes.
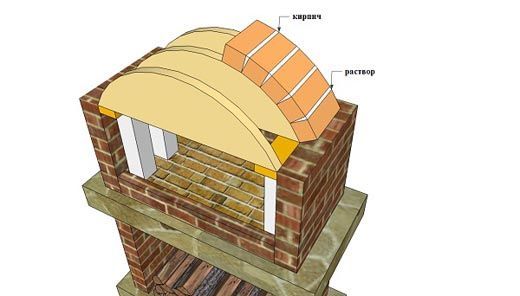
- For beautiful masonry We install a curved vault (special temporary formwork).
- We check each laid row with the order diagram and make notes with a pencil or chalk.
Important! To avoid confusion, maintain consistency in your work. Start the next row only after you finish the previous one.
Chimney installation
When constructing a chimney, you must carefully monitor its verticality. The better the work is done, the better the draft in the fireplace and the less likely it is that carbon monoxide will get inside the room.
Be sure to wipe the inner walls of the chimney with a rag soaked in liquid clay solution, which will help create a perfectly flat and smooth surface without cracks. The chimney is laid above the roof using cement mortar. We protect the place where the chimney passes through the ceiling from high temperatures. To do this, we lay out the fluff (the expansion of the pipe in the ceiling) and cover it on all sides with asbestos or felt soaked in a clay solution. On the outside above the roof we make an overhang (“otter”) to protect against leaks. The outer hole of the pipe must be protected from precipitation.

Orders of fluff and otter chimney
The installation of a chimney can be simplified if you use special pipes for the chimney. These can be modular pipes made of stainless steel, ceramic pipes, as well as thin-walled structures made of heat-resistant and acid-resistant steel.
Decorative decoration of the fireplace
With high-quality masonry and an ideal choice of bricks, additional cladding is not necessary. You can only carefully seal the seams with a special grout.
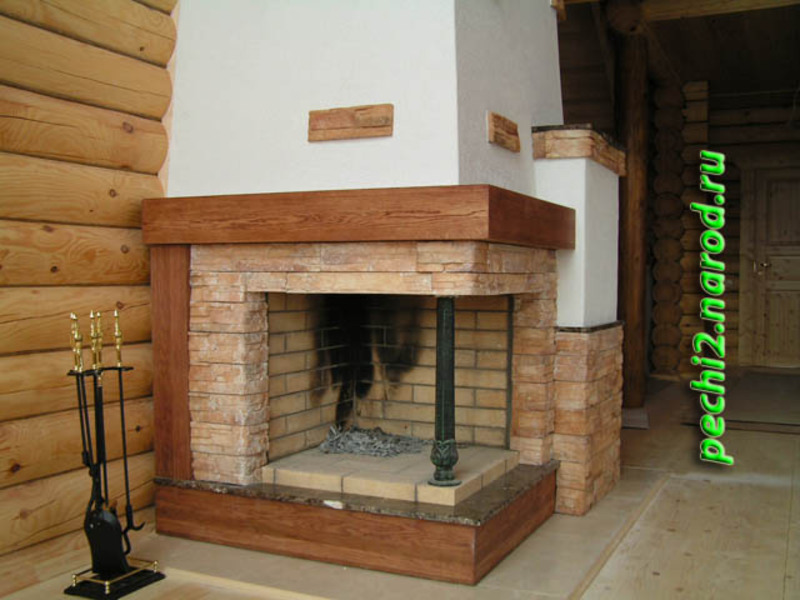
Finishing can be done with any building materials - decorative plaster, tiles, tiles, marble, various types brick or stone. Concrete imitation of natural textures (expensive wood, stone) will also look good.
Recently, it has become fashionable to clad wood-burning fireplaces with natural stone, leaving part of the brickwork visible. You can complement the cladding with elements made of glass, metal, wood or forged cast iron sculptures.

Today you can also purchase ready-made portals made from natural materials such as travertine, soapstone, and marble. They will truly decorate the hearth you have built and give it more beauty and uniqueness.
The tips and tricks in this article will help you build your own wood burning fireplace. You can embody all your design fantasies in it, thus creating a completely unique piece. A fireplace made according to the rules will delight you with its warmth and its beautiful view.
Video: DIY classic brick fireplace
A wood-burning fireplace is a decorative structure with an open firebox. A complex, at first glance, structure can be erected with your own hands. The construction of a homemade stove requires the owner to have good tool skills and knowledge of the basics of construction.
Preparatory work
Any kind construction work begins with drawing up a project. Drawings of wood-burning fireplaces are available on our website. Based on projects, we determine the quantity required material. As for the tools, the set includes: a trowel, a building level and cord, a foam grater, an old trough (you will mix the solution in it) and a grinder.
Drawings should be selected for the future location of the fireplace. To avoid confusion, it is recommended to first decide on the type of fireplace (there are corner and regular), and then start looking for a suitable drawing. Advice: do not choose a well-ventilated place for the fireplace or an area where wooden interior items will be placed or fabric will hang in the future.
The drawings must contain the main parameters of the fireplace: width, height and depth. In addition, they must indicate the dimensions of the portal, ash pan and stove. After agreeing on the dimensions, we begin to prepare the foundation of the house.
Construction of the foundation
The base for the fireplace can be easily built alone and with your own hands. At the base of the house you need to dig a small pit 50-65 cm deep. The bottom of the pit is covered with a layer of gravel. The crushed stone on top is filled with cement mortar in a ratio of 3:1, where three is the number of buckets of sand, and one is one bucket of cement. You should not pour a foundation that is too strong, as it can cause cracks not only in the fireplace, but also in the foundation of the house.
A wood-burning fireplace requires a small recess, so it is better not to level the foundation for adjustment with the floor; leave a small recess of 10 cm. The base takes about three days to set. During this time, you can start preparing waterproofing materials and purchasing bricks.
Start of masonry
If this is your first time working with brick with your own hands, you should know one of its features - it absorbs moisture well. Therefore, before laying the first rows, it is better to soak the building material for a day. Soak about 100 bricks, this will be enough if you are building a standard sized fireplace.
As for the mortar, the first rows are laid on a mixture of sand, clay and cement. A properly prepared solution with your own hands will prevent the base of the fireplace from falling apart a few months after commissioning.
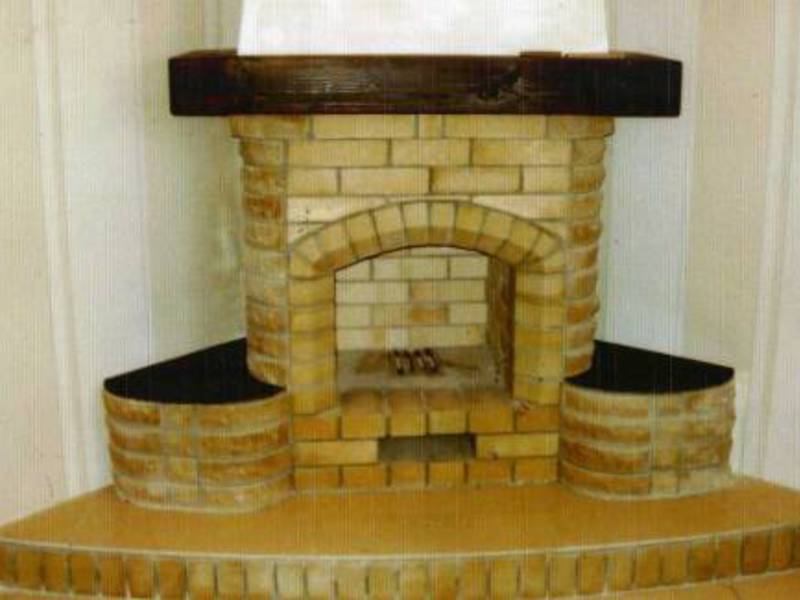
Laying an arched ceiling. Castle brick
Features of masonry
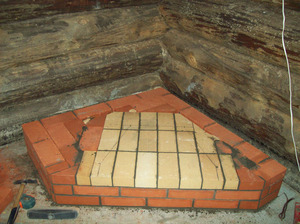
- The first row is placed on a previously prepared waterproofing layer of roofing felt. The monolithic base is made up to the fourth row. The foundation for a fireplace, just like the foundation for a house, needs a reliable structure;
- Bandaging seams of a monolithic structure. During construction, you will find that a whole brick does not always fit into the intended place. You need to break it into small pieces with your own hands and fill the free space with them. When building the base for a wood-burning fireplace, pay special attention to tightness;
- A large seam reduces the strength of the entire structure and its heat capacity. Even the foundation of a house can suffer from high temperatures;
- Do not place the brick with the cut part inward. The unsmooth surface of the chimney causes the accumulation of soot, which will have to be cleaned regularly with your own hands;
- It is better to start each row with a corner brick. Don't underestimate the correctness of this technology. Houses and multi-storey buildings are built this way. It is good because it reduces the number of chips in the masonry;
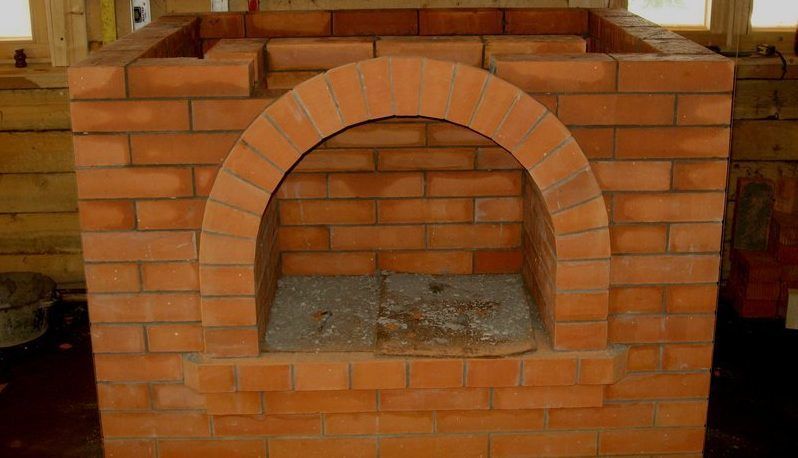
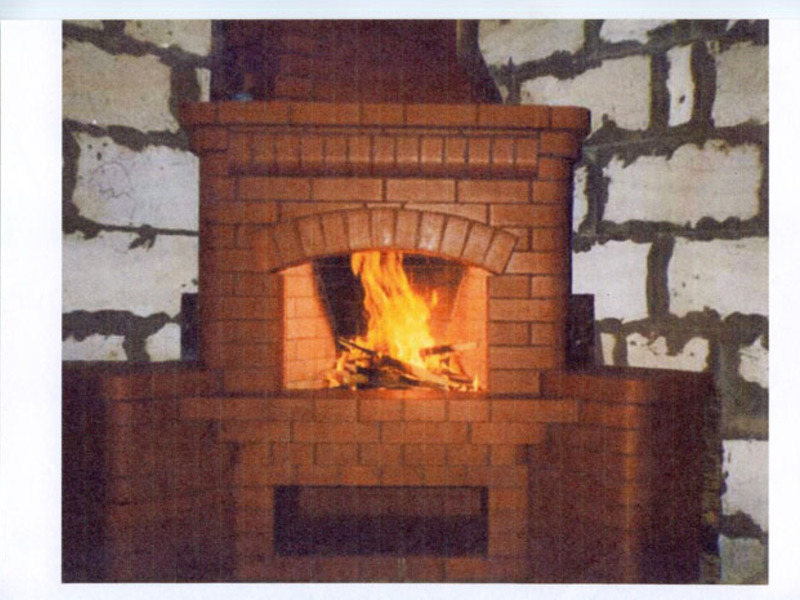
Design features of masonry arches
An arch is an important decorative element. Without it, fireplaces look, to put it mildly, very unnatural and ugly. A complex ceiling can be easily done with your own hands; there is no need to call a professional. When choosing a covering material, try to avoid defective bricks. Only selected building materials are suitable for the arch.
Why can’t the ceiling for the arch be made of metal, since this material is actively used in the construction of a house? Metal tends to expand under high temperature. The more fire acts on it, the more the metal plate expands. As a result, its expansion will reach its limit and destroy part of the fireplace. You will have to restore the fireplace with your own hands for quite a long time.

Arch assembly instructions
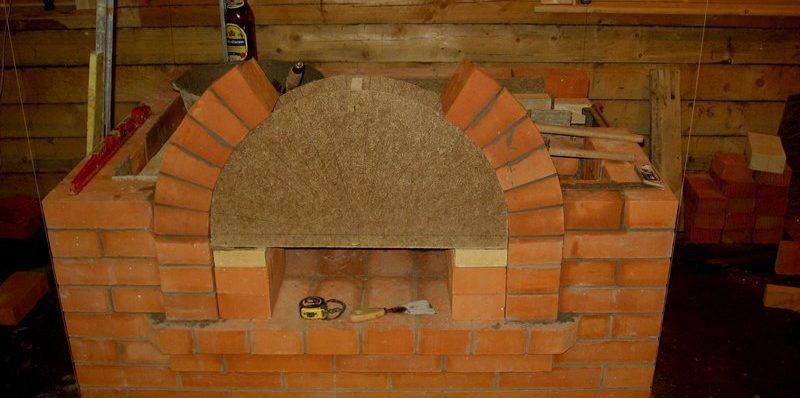
After the structure has completely dried, the formwork is completely dismantled with your own hands. First of all, the formwork is removed from the vertical wedges. Then you can begin to dismantle the bricks under the top formwork. Remember that the formwork of a wood-burning fireplace is different from the formwork of a house, so dismantling work should be carried out as carefully as possible.
The final stage is laying the chimney
The brick chimney pipe should not be less than the thickness of the side of the brick. If the wood-burning fireplace is to be plastered, then the thickness of the chimney can be made 1/4 of a brick.
Laying a chimney in technology is not much different from building a foundation for a fireplace. Brick chimney- this is the same monolithic structure as the main part of the fireplace.
Practice has shown that difficulties regularly arise at the point where the pipe passes through the roof. To eliminate this problem, the masonry must be increased by 10-20%. Expansion of the masonry also serves other purposes - the large size of the pipeline increases the safety and strength of the entire structure.
During the construction of the chimney, do not forget to wipe its inside with a damp cloth.
Dried drops of solution will contribute to the accumulation of soot in the future. Remember, the surface of the chimney should be as smooth as possible.
The construction of the chimney is completed by laying a riser for the pipe. For the construction of the riser, it is also recommended to use only selected bricks.
Secrets of treating joint pain from our regular reader.
Hello!
My name is Genady Alekseevich. I am a stove maker with over 20 years of experience. I am engaged in both repair and construction of Russian stoves and fireplaces. I always perform the work very efficiently and carefully, which negatively affects the condition of the joints. As I grew older, the pain began to get worse, to the point where I could no longer work. Having tried many medications and folk ways treatment, I realized how serious my disease was, since there was no positive effect. Until I came across one remedy that I want to tell you about.
This is a unique mixture of the rarest and most powerful natural healing substances. This remedy has proven its effectiveness not only for patients, but also for science, which has recognized it as an effective drug. Pain in the joints and back goes away in 10-15 days, as studies have shown. The main thing is to strictly follow the instructions in the method. You can order the product in original packaging, with a quality guarantee, at
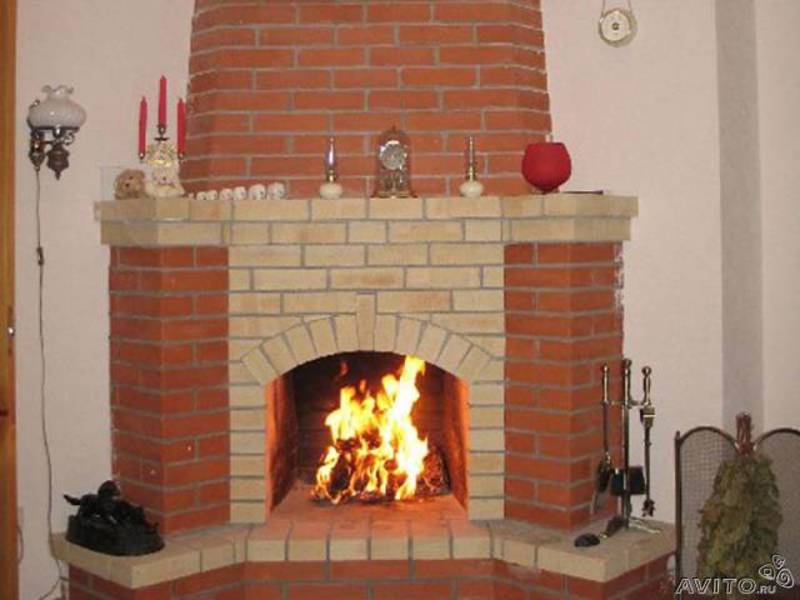
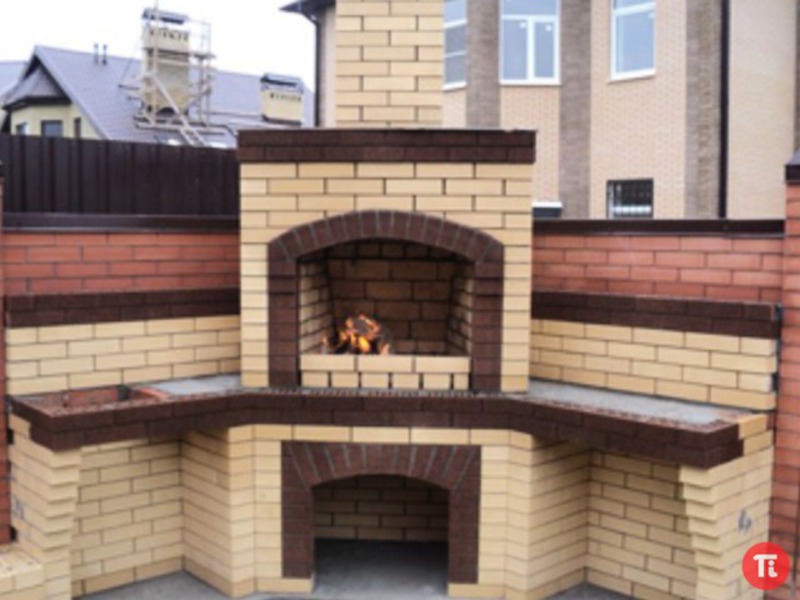
Any brick fireplace is able to create a peaceful, cozy environment in the house. Installing such a structure is a rather complicated process, but if you wish, you can create the product yourself. To do this you need to select good material and follow the order.
Description and designs of fireplaces
A brick fireplace is like a simple stove where the firebox is open. Visually, the product represents a small niche in the wall. It is important to remember that such a brick structure has low heat transfer, which means additional heating will be required in winter.
Today there are a number of designs for wood-burning brick fireplaces for the home.
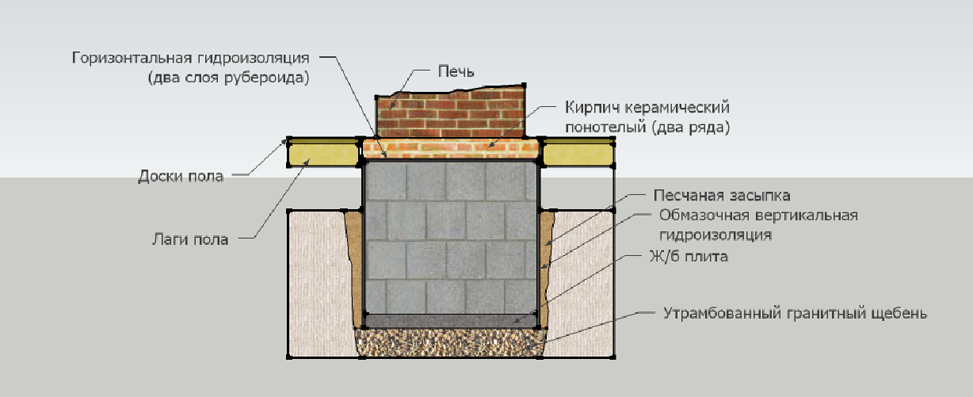
Foundation structure
 It must be remembered that the weight of a corner or other wood-burning fireplace can be more than 500 kg. Accordingly, you will have to take care of the presence of a foundation. Ideally, it is included in the overall construction project. If the house is already ready, it is necessary to perform several important calculations.
In any case, the dimensions of the foundation depend on the dimensions of the wood-burning corner fireplace made of brick. In this case, it is important to ensure that there is a gap of 5 cm between the foundation of the building and the stone structure. Sand is placed here, which will help avoid the formation of cracks during the shrinkage process.
For one-story houses The depth of the pit should be about 50 cm, and for two-story ones - at least 80 cm. A sand cushion is organized at the bottom of the pit. If the soil is loose, you will need a mixture of sand and gravel. All layers are thoroughly compacted and moistened. Rubble concrete is optimal for constructing the foundation of a corner fireplace.
Building a foundation with your own hands goes like this:
- formwork is created, the dimensions of which correspond to the dimensions of the foundation;
- roofing material or bitumen is used as waterproofing;
- the formwork is carefully laid on a base of large stones and crushed stone, then the layer is filled with mortar, followed by rubble stone;
- the upper part of the foundation is leveled and covered with plastic film.
It is important to ensure that the top layer rises 5 cm above the finished floor.
Construction of a brick fireplace
First of all, it is necessary to mark the contours of the wood-burning fireplace on the wall. The foundation itself is covered with a waterproofing layer. Refractory brick is rinsed in water to remove dust. It is customary to soak ordinary bricks for 30 seconds. This will help get rid of air bubbles.
The work is being carried out in stages.
When building a brick fireplace, you need to take care of the availability chimney. This will require sand-cement mortar and red brick. You will also need a chimney or a galvanized iron cap.
Important points
In order for the design to be durable, reliable and safe, you should remember several important nuances during the process of its creation.
- When constructing a firebox, it is necessary to organize something like a trough, so that firewood or ashes will not fall out.
- Refractory bricks are suitable for organizing the inside of the firebox. It is recommended to lay it in a cone.
- In the area where the fireplace meets the chimney, you need to install a damper to control the draft.
- To secure the frame of the fireplace insert, clasps are used, that is, steel strips 3 mm thick. They are placed in the masonry seam and then filled with mortar.
- It is important to remember that the coefficient of thermal expansion of metal exceeds that of brick. Respectively, between the frame and the masonry itself it is necessary to place asbestos insulation 5 mm thick.
- During the construction process, it is worthwhile to provide functional niches. We are talking about a place to store firewood, as well as a kind of countertop where you can store utensils.
- Finished brick structures must be dried for 5–7 days, avoiding drafts in the room. After this, you can start heating. The structure is heated gradually so that the solution sinteres evenly. You can proceed to finishing work only after this stage.
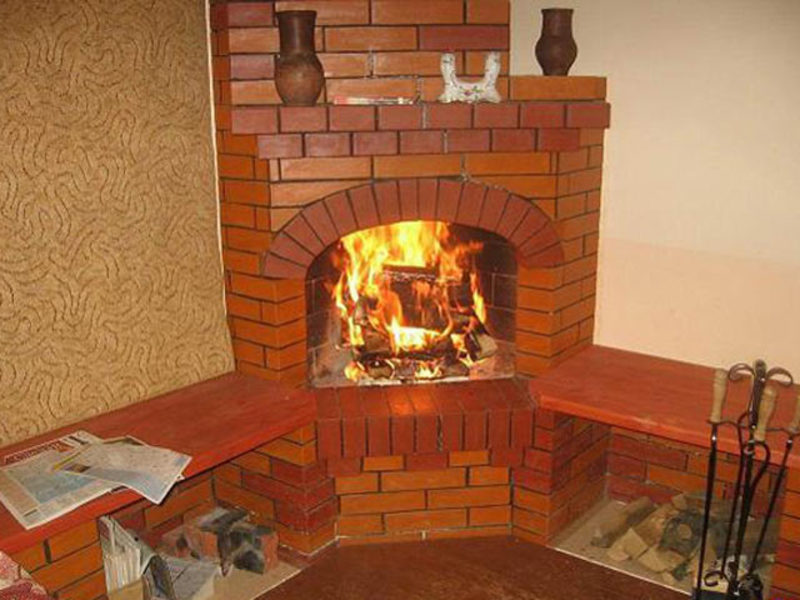
Brick fireplaces: photo

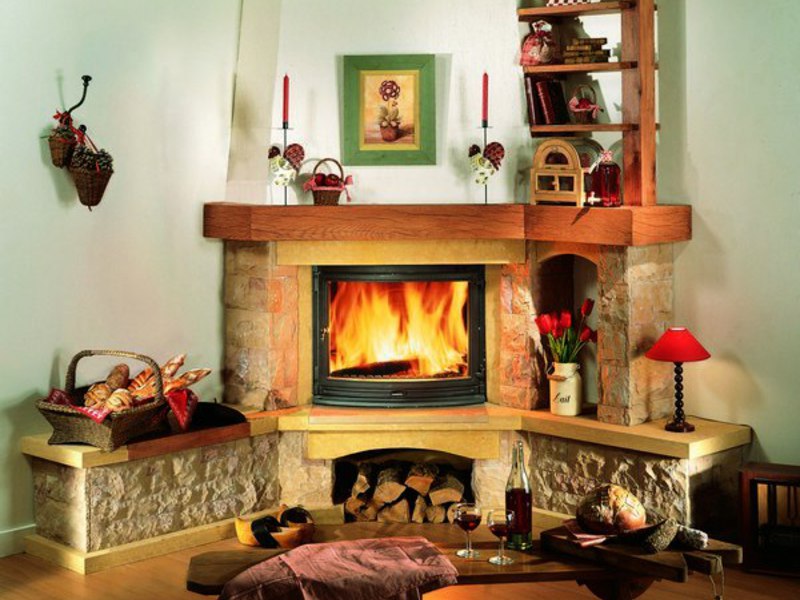

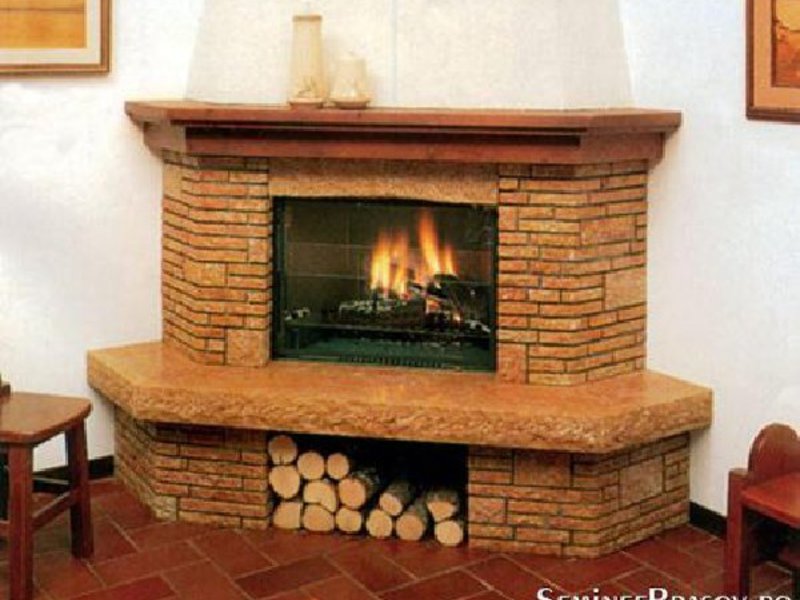


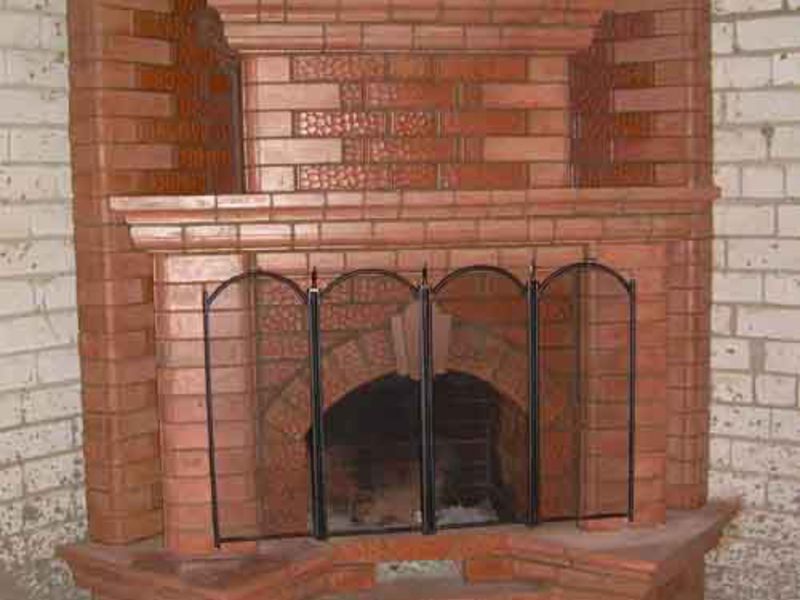

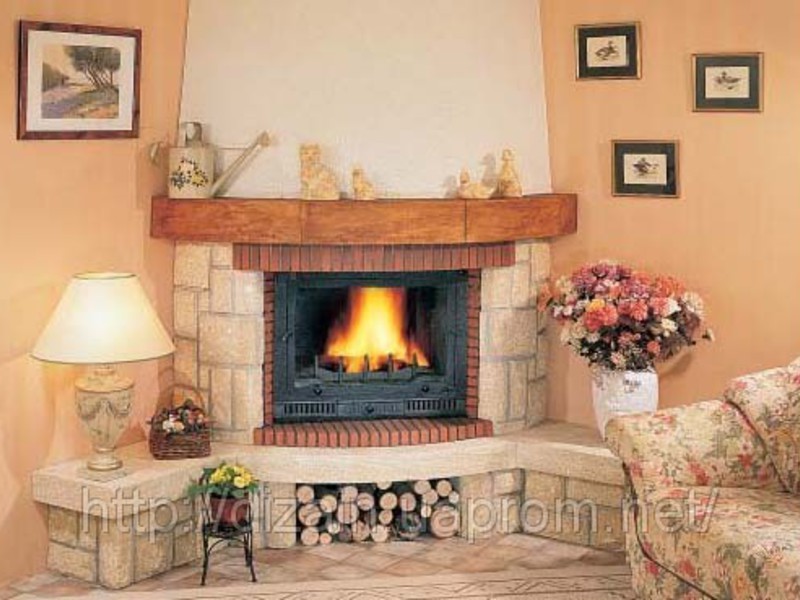
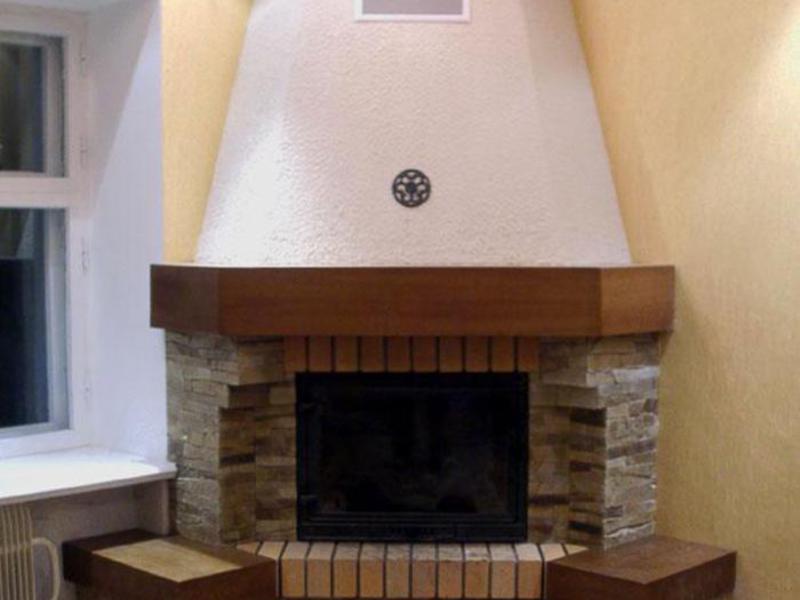

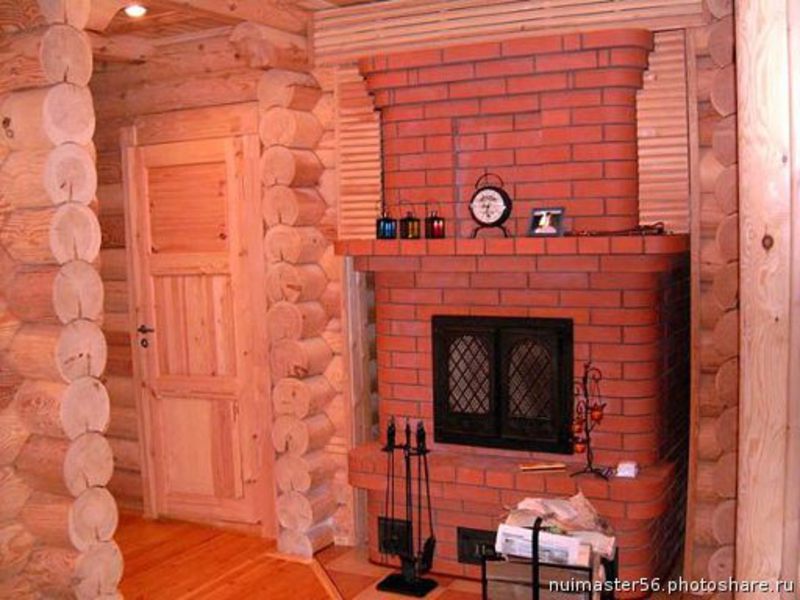
Finishing a finished brick fireplace
 As you can see from the photo of brick fireplaces, there are many options for finishing the finished structure.
The most expensive option is to use natural stone. Most often it is marble or granite. Similar material will help maintain an optimal indoor microclimate, and will also become the best interior decoration. During the installation process, such expensive materials must be wrapped in film, thereby avoiding scratches or chips. Laying is done from below using tile adhesive.
More simple option considered plaster. With its help it will be possible to level the walls and hide defects. After this, you can paint the fireplace in any shade.
If the masonry is done really well, and the brick was not damaged during the work, then you don’t have to worry about finishing the finished structure.
Increasingly, when constructing new houses on summer cottage owners are thinking about installing a fireplace that performs two important tasks - decoration and heating the room. According to experts, the effectiveness of fireplaces as a tool for heating rooms does not exceed 25%, and therefore it is worth taking additional measures in advance to ensure the required temperature conditions in the house.
A brick fireplace will add warmth and comfort to the house, and putting it together according to an ordering diagram will not be difficult.
However, if you decide to build a full-fledged fireplace out of brick with your own hands, then be prepared to go through a number of labor-intensive stages, starting with planning and ending with exterior decoration.
Preliminary stage
The primary tasks for a novice builder will be creating a fireplace project (its arrangement), selecting a location, selecting and purchasing consumables for its construction. As you know, any project begins with a plan. IN in this case it is necessary to determine the shape and dimensions of the future structure. When making calculations for the future fireplace, it is worth starting from several factors - the area of the premises in the house, the size of the brick used and the proportions recommended by professional builders. First you need to determine the dimensions of the firebox (combustion chamber). To do this, the area of the room must be divided by 100, which will give the required size. For example, with a heated room area of 50 sq.m., the size of the firebox should be at least 0.5 sq.m.
Next, we calculate the depth and height of the firebox. Here the calculation is also very simple. So, the depth of the firebox is 1.5-2 times less than its width, and the height, on the contrary, is 1.5 times more. Thus, with a firebox width of 0.5 sq.m., its depth will be about 30-50 cm, and its height (with a masonry width of 3 bricks) will be about 1 m 20 cm.
And another important indicator is the area of the hole for smoke removal. When choosing its size, experts recommend relying on a ratio of 1:10 in relation to the firebox area. It is also worth taking note of the fact that the length of the straight vertical section of the pipe itself should fit within 4-5 m, which will ensure normal draft and prevent smoking.
After making the calculations, you need to turn to drawing up a drawing of the fireplace, displaying in detail each row of the future structure. If you do not have sufficiently high skills in engineering graphics, then you can select a ready-made drawing and procedures. The order is a schematic representation of the order in which each row of the fireplace is laid, facilitating the process of installation and control over it. Using ready-made sketches will allow you to choose the shape of the fireplace (taking into account pre-calculated parameters), determine its place in the room and avoid simple mistakes during the laying process.
Return to contents
Choosing material
Fireplaces, built taking into account all the requirements, are a very bulky structure, the weight of which can reach half a ton. Therefore, special attention should be paid to the choice building materials and the necessary tools.

The basis of every fireplace for the home, of course, is brickwork Therefore, the choice of brick is given utmost importance. For a medium-sized structure, you will need to purchase about 300-350 bricks. When purchasing, it is recommended to pay attention to the shape of the brick, surface cleanliness and color. The most suitable should be considered a brick with a smooth surface of a deep orange color, without chipped corners or melted areas. Any defect in even one brick in the entire structure can lead to additional heat loss and a decrease in the efficiency of the fireplace as a whole.
In addition to bricks, the following consumables will be used:
- refractory clay (at the rate of 1/10 cubic meters per 100 bricks and not less than 2/10 cubic meters per foundation);
- cement (grade 200 and above at a ratio of 30 kg per 100 bricks);
- crushed stone (for forming a foundation; the optimal fraction will be from 3 to 6 cm);
- construction sand (a reserve should be created taking into account the consumption of 0.5 cubic meters for masonry and 3/10 cubic meters for the foundation);
- reinforcement (about 20 rods 8/10 m long with a cross-sectional diameter of 8-10 mm);
- a set of standard tools (grinder, ruler, plumb line, level, welding machine and a hacksaw);
- as auxiliary materials– fireplace plan and arrangement.
Having prepared everything you need and decided on the location of the fireplace, you can begin construction.
Return to contents
Arrangement and laying of a fireplace
It is very difficult for the average person to build a brick fireplace with their own hands in a house.

But, as we know, there are no insurmountable obstacles. Therefore, work on the future family hearth should begin with preparing the foundation. It should be remembered that the concrete support for the fireplace should be poured separately from the foundation of the house, which will avoid damage to the combustion chamber and chimney due to seasonal soil movements.
First of all, it is necessary to prepare a small pit with dimensions of 0.5 m in depth and a width of 30-35 cm greater than the width of the fireplace itself. The base of the pit is compacted with several layers of sand or sand- gravel mixture. Formwork is installed on the resulting gravel base, the inner part of which is reinforced. The reinforcement bars should be laid out crosswise, fastening the joints by welding. The solution is poured into the pit prepared in this way, taking into account that the first layer of brick should be at the level of the clean floor. Greatest strength concrete base will reach the future fireplace in 5-7 days. At this time, at home it is worth preparing the clay for use by soaking it in a barrel. It is also worth taking care of the cleanliness of the sand - it must be sifted and washed several times, getting rid of large fractions. Both of these elements will serve as the basis for the mortar used for masonry. To knead it, it is necessary to fill the washed sand with clay until a homogeneous thick mass is formed. Excessive fluidity of the solution is not allowed, but excessive dryness is also unacceptable.
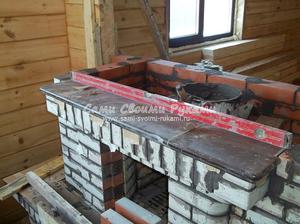
After making sure that the foundation is strong, you should begin work on marking and laying the fireplace, covering the concrete base with a layer of roofing felt sheets. Having outlined the boundaries of the future structure on the wall adjacent to the fireplace, we proceed to the laying.
As a rule, the first layer is first laid dry, focusing on the existing order. Only after carefully measuring all the bricks, cutting them off with a grinder if necessary, should you begin to apply mortar under each brick. You should start from the corners, checking the horizontality using a plumb line or I-beam. Subsequently, a layer is laid, focusing on the finished corner structure and order. The seams should be made thin; their thickening is allowed only in the core of the masonry.

Excess mortar must be removed in a timely manner, and when laying the next refractory element, the required amount of mortar must be assessed. Use a level to check each laid row for horizontalness. If any inaccuracies are found in the row laying, correct them immediately. The key to success in this work should be considered strict adherence to the ordering scheme. It is worth remembering that the inner surface of the combustion chamber must be smooth, and small irregularities must be treated with a sponge soaked in a clay solution. Any unevenness in the masonry and finishing will become a source of soot collection in the future.
The most careful consideration should be given to the installation of the tapering elements of the fireplace - the chimney and pipe.
Based on the ordering scheme, it is necessary to carefully select and process each brick, rubbing out the unevenness of the inner part by hand. Remove excess solution with a rag. Narrow the chimney opening to one brick and cover it with a damper.
The final step in the process of building a fireplace is the final work related to the finishing of the outer part of the fireplace and the implementation of measures aimed at eliminating the possibility of a fire in the house.
 Chicken kebab marinated with lemons and mineral water
 Step-by-step recipe for making Mediterranean seafood soup
 Pear compote without sterilization for the winter Pear compote is very tasty