How to cover a house with facing bricks. Cladding the walls of a house with bricks
Every developer, sooner or later, thinks about the exterior decoration of his home.
The modern possibilities of this segment of the construction market are truly limitless. This includes plaster, plastic siding, wall slabs, façade tile cladding, or variations thereof.
But, until now, brick remains one of the most popular facing materials. Consumers have always associated brick with reliability and durability.
And the variety of its colors, textures, standard sizes, and types of masonry allows you to obtain building facades that are wonderful in design. If you impose old house brick, then a dilapidated building will turn into a modern and stylish one.
What brick to cover the house with?
Regardless of the material from which the facing brick is made, it must meet the following requirements:
- Correct shape geometry
- Clear edges
- Uniform color
- There should be no cracks or delaminations on the surface
- Frost resistance: F25, F35, F50, where the numbers indicate the number of cycles of alternating thawing/freezing, during which there are no signs of visible damage in the products, and the reduction in compressive strength does not exceed 20%. Products with frost resistance F25 are used in the southern regions of the country, F35 – suitable for central Russia, F50 – for more northern regions
- Water absorption – no less than 6%
If you read the manufacturer's annotations, you will remember the proverb: every sandpiper praises its swamp. Those who produce ceramic bricks extol its characteristics in every possible way and belittle the advantages of silicate bricks. And vice versa. This is understandable - competition. What do the facts say?
1. Ceramic brick – clay filler. The technology for its preparation is more complex and time-consuming than that of silicate, which is why it is more expensive. The price of one brick ranges (depending on texture, shape, color) from 10 to 25 rubles. Its positive properties:
- Water absorption – from 6 to 14%. GOST allows you to increase this indicator depending on the type of clay used.
- Frost resistance - F25, F35, F50. For clinker products this figure is 100.
- Low thermal conductivity – 0.3 – 0.5 W/m°C
- A large selection of standard sizes, textures and colors of products, which allows you to cladding not only walls, but also columns and arches.
- Density – 1300 – 1450 kg/m3, clinker – up to 2100 kg/m3. This indicator is important for calculating the bearing capacity of the foundation.
2. Sand-lime brick. Filler: quartz sand. The cost of the product varies from 7 to 16 rubles. Its properties:
- Water absorption – 6-8%.
- Frost resistance – from 15 to 50 cycles, depending on the manufacturer.
- Thermal conductivity - from 0.38 to 0.7 W/m °C
- Large selection of textures and colors finished products.
- Density – 1500-1950 kg/m3.
A comparative analysis of the characteristics shows that both types of facing bricks have positive and negative properties. Ceramic products are superior in density (except for clinker versions) and thermal conductivity. Not as radically as is commonly believed, but still.
Therefore, if it is necessary to increase the thermal conductivity of a house (this applies more to building structures made of cinder block, brick, etc.), or when cladding an old house to reduce the load on the foundation, then ceramic products are used.
But sand-lime brick more affordable in price, has best characteristics for sound insulation and absorbs moisture worse. The color scheme and texture of the products are not very different, but ceramic products have a much larger choice. The quality of finished products directly depends on the integrity of the manufacturer.
3. Bricks that are made using semi-dry hyperpressing technology. For example, products from the Bassoon brand, with shell rock fillers. With other, almost equal indicators with ceramic bricks, it has frost resistance up to 100-150 cycles and increased density. Price from 17 to 38 rubles. per product.
Cladding a house with bricks
For various reasons, developers clad their houses. This and the desire to protect wooden walls building, insulate it, or give a “second life” to old housing construction. There are many reasons, but you can only brick a house correctly once.
If a private owner wants to do this work with his own hands, then the technological process must be thoroughly studied:
1. It is necessary to calculate the number of bricks required. Knowing the net area of the walls (the total area of the walls minus the area of windows and doors) and the fact that there are 51 products per 1 m2 of masonry, you can calculate the required number of bricks. This is necessary not only for drawing up an estimate, but also in order to understand how much brick you need to purchase at once, because ceramic products of the same color, but from different batches, may differ in shade.
2. If the house is made of timber or frame, then it is necessary to perform antiseptic treatment of the wood. It is advisable to do this twice, every other day.
3. It is necessary to strengthen the existing foundation, and fill in a new one. Bandaging the foundations is done as follows:
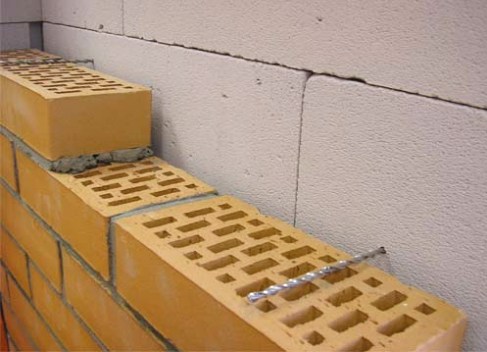
- Holes with a diameter of 12 mm, a depth of 100 mm are drilled into concrete, or 200 mm into brick, 100 mm below the top mark of the foundation with a downward slope of 15-20 degrees.
- Periodic reinforcement 12 mm is driven in there. It should stick out 150 mm.
- When the new foundation is poured (recommended thickness 30 cm), the anchors will remain in the concrete.
- Waterproofing is made of two layers of roofing felt.
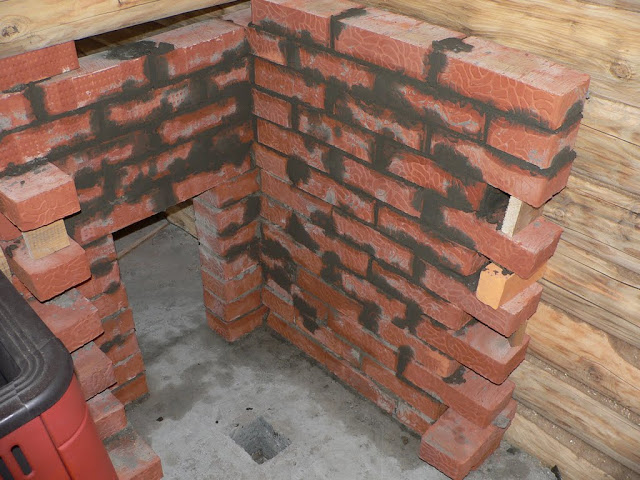
4. What to cover wooden house brick, and not spoil the wood - you need to arrange ventilation. The tree attracts moisture and rots, and the vents and air gap (30-40 mm) installed (at the rate of 75 cm per 20 m2 area) create closed room conditions for the tree, which allows wooden structures serve almost forever. The vents need to be covered with a rodent net.
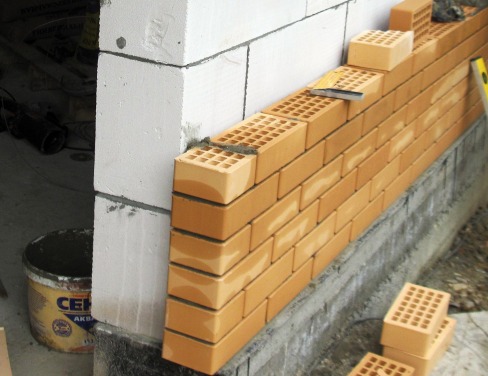
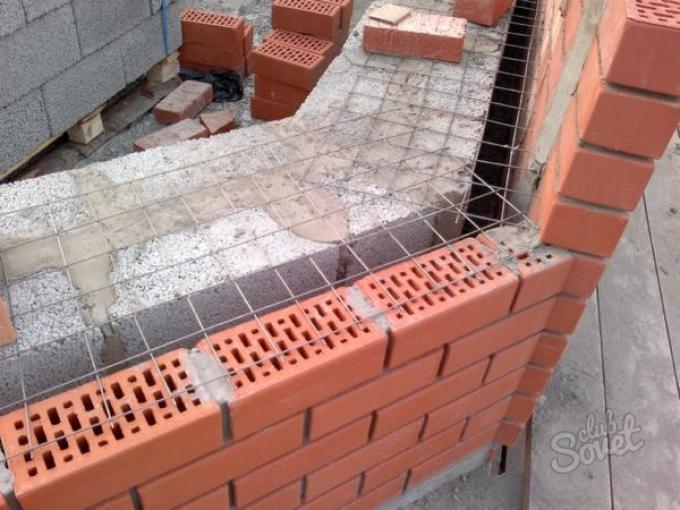
5. Now, in fact, the finishing of the house with brick begins, with the obligatory dressing of the cladding and walls of the house. If the house is made of timber, then the nail is driven into the upper part of the log, closer to the seam between them, at an angle of about 45 degrees. The wire (soft, in two folds, 3 mm thick) is wrapped around a nail, which is then pressed or bent.
The wire is drawn straight to the middle of the brick, and then to the sides by 20 cm. And so on around the entire perimeter, in increments of 50 cm. It is not necessary to do everything in one row. Connections can be scattered over the wall area. If the house is frame or made of wooden bricks, then nails 100-120 mm long are suitable for bandaging. If the house is block, then clamps are used for bandaging.
6. When facing with ceramic products, finished masonry often covered with efflorescence (whitish stains). It is generally believed that this may be due to the ingredients in the solution. To avoid this, professionals advise preparing a solution from special dry mixtures. Or buy Portland cement without additives.
Foreign builders suggest doing masonry with cement-lime mortar, since, in their opinion, lime neutralizes the effect of alkalis. Mix 1 part of Portland cement grade 500, two parts of lime paste and 8 parts of sifted sand. Our builders have the opposite opinion.
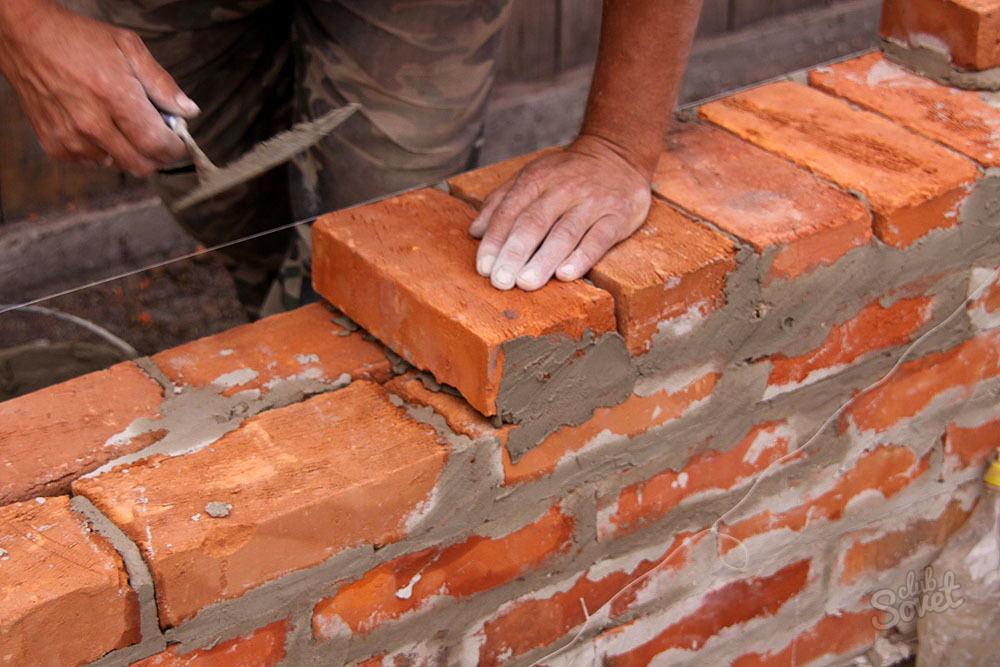
7. Masonry is carried out from the bottom up, its verticality is constantly checked with a plumb line. The seams are made no more than 10-14 mm thick. For better ventilation, the masonry is not brought to the eaves of the building by 1 row.
A house lined with brick will bring you satisfaction for many years with its appearance and quality of the material.
No matter how good a wooden house is, its walls are subject to wear and especially to exposure environment much faster than, for example, brick, so at some point it may be necessary to cladding the house with brick.
Let’s immediately say that this is quite labor-intensive work that will require us to be attentive and strictly adhere to the main technological points, but it can be done with our own hands.
Where to start
- Brick. Facing, building brick, silicate - it all depends on our desire.
- Mortar - which means cement grade 200-250, sand - it’s good if it’s from the river.
- Fittings. Required for the foundation for cladding. Possibly a small section.
- Crushed stone of medium fraction is also used for preparing concrete.
Brick calculations can be made based on the fact that approximately 50 pieces of facing brick are required per square meter.
Advice! When purchasing bricks, which will be the final facade, it is necessary to purchase 10-15% more than is necessary according to calculations. In case of battle, for example.
Cement, sand and other materials can be purchased as needed.
Foundation
The weight of the facing wall will be very significant, for example, 10 square meters of wall can weigh a total of about 40 tons, so first we fill the base.
We dig a trench around the perimeter of the entire house, lay reinforcement and pour concrete.
Here we need:
- Several shovels earthworks you'll have to do it yourself.
- Pickaxe and crowbar. There is always a lot of construction waste in the ground near the house.
- Concrete mixer, after all, we will mix concrete in a mechanical device.
- A pair of trowels.
- Level, hammer, wood saw. Everything for formwork.
We prepare a trench at least 50 cm deep and 30-40 cm wide. Some will say that this is too much, but we recommend that it is better to make a reinforced foundation than to risk all the work at the very beginning.
We place reinforcement in the trench, tied in the form of a rectangle, and fill everything with liquid concrete.
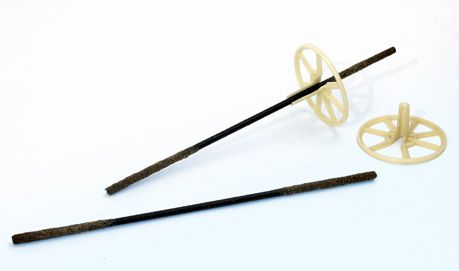
For large volumes of concrete work, construction vibrators are always used to prevent the formation of voids, but before we line a wooden house with bricks, we will try to “vibrate” the concrete a little with simple sticks so that there are no air bubbles in the foundation.
Important! Such attention to the foundation makes sense; all the work depends on the foundation, so we fill it in one go, trying not to interrupt the process.
We leave the base to dry, and after a few days we can begin laying, the concrete will already harden and will only continue to set in the future.
Preparing the walls
In principle, all preparation boils down to the fact that we treat the wood with antiseptics, antifungal compounds and anti-mold agents. Moreover, some experts believe that this must be done several times before cladding.
Before processing, we go over the walls, remove and dismantle various protrusions, metal parts, remove dirt or moss, in general, we bring the walls to a certain cleanliness.
For additional insulation, you can insulate the walls mineral wool, this material is completely safe, and most importantly, it breathes well and is not susceptible to the spread of mold or mildew.
The first thing we need to know is that there must be at least 6-10 cm of distance between the masonry and the wall of the house. This is necessary for normal natural air ventilation, which will prevent the formation of mold.
For masonry work we will need:
- Trowels.
- Hammer.
- Construction level.
- Plumb lines and weights.
- Rule.
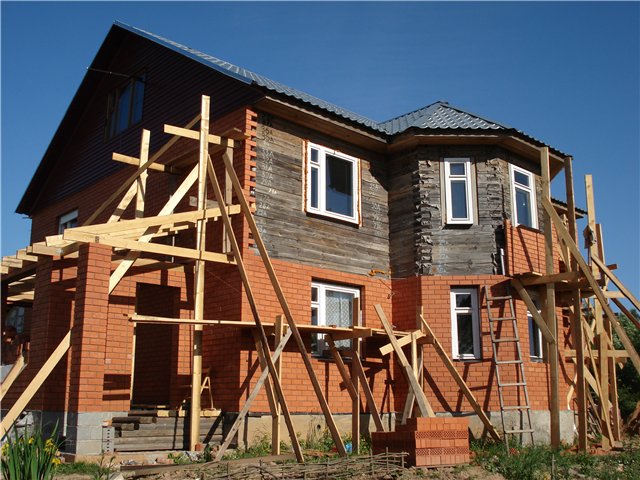
- Scaffolding. If we have two-story house, without them it will not be possible to carry out masonry normally
We prepare the cement mortar based on the proportion of one to four; it is a fairly strong mortar, and at the same time, thanks to the large amount of sand, it “breathes.”
There is not much difficulty in how to properly line a wooden house with bricks, the main thing is care and accuracy.
We lay the first row of masonry on waterproofing, and check each brick by level and vertical plumb. Any deviations must be eliminated immediately, because what deviates by 10 mm at the beginning of the masonry will, by the end, cause the wall to deviate by centimeters!
Ventilation
Approximately on the second row of masonry, we leave a space between the side joints of the brick that is not filled with mortar; these will be our ventilation ducts. At the top, already under the roof itself, we also leave holes in the masonry, simply cover them with a decorative strip.
Along with ventilation, we will also need a drainage hole, which we will leave at the very bottom, on the first row of masonry, and moisture will escape through it in case of condensation.
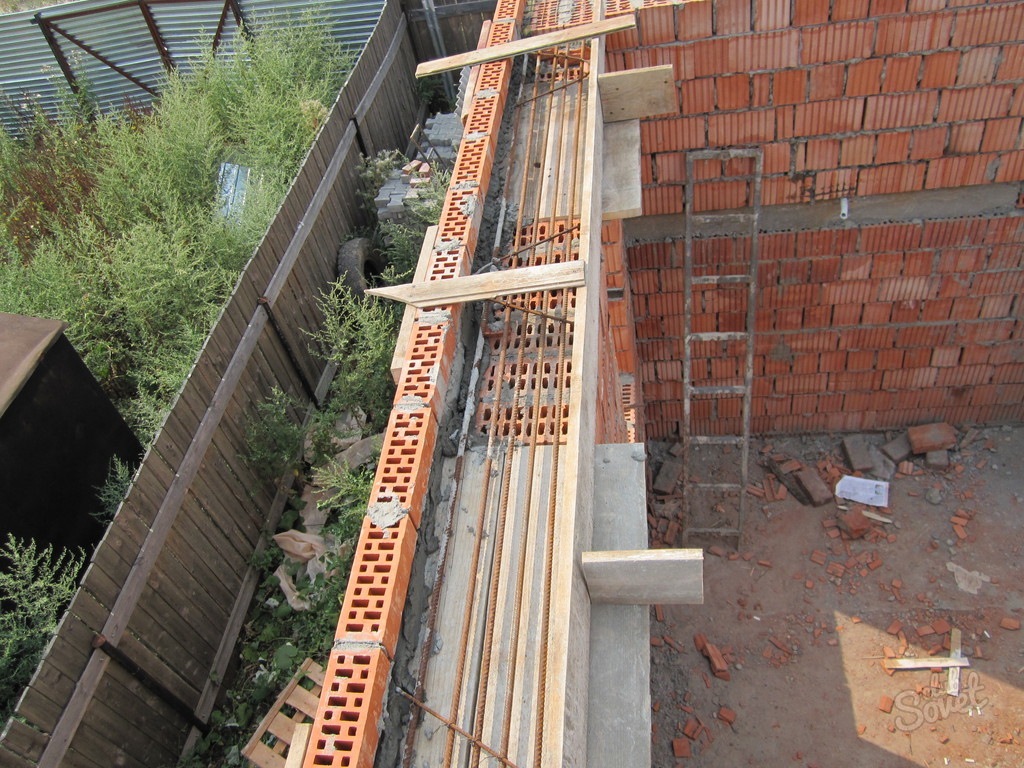
Jumper arrangement
The wall of a house is rarely solid, and in our case, when we completely enclose the house, we always have windows and doors.
There is no difficulty in constructing the opening as such, the only point is the construction of the jumper, and there are four options:
- Concrete beam. A ready-made reinforced concrete lintel, the price of which is quite low, will allow us to instantly cover the opening and carry out the masonry further.
- Steel angle lintel. The corner is recessed into the masonry, and the brick is placed on its edges.
- Own jumper. You will have to tie the reinforcement, build the formwork and fill everything with concrete.
- The wedge is constructed of brick in the shape of a semicircle. A very specific lintel that requires a lot of knowledge in construction.
Based on the complexity of some options, we will focus on a simple concrete and ready-made lintel, which we install on the mortar, and continue with the laying.
Nuances of masonry
If we carry out the masonry immediately for finishing, let’s say, then we will have to pay close attention to the appearance, immediately remove all the remaining mortar, and carefully rub down the seams. Try to keep the seam itself in one thin line.
Let us remind you again that each row must be checked by level, as well as by a horizontal guide and a vertical plumb line.
Many experts suggest soaking each brick in water for greater adhesion before laying it, but here it all depends on the choice of material, and the solution itself binds the parts of the cladding quite tightly. For example, the same double sand-lime brick M 150 due to its physical properties will take a long time to dry.
Mounting to the wall of the house
The cladding must be connected to the house. This can be achieved using metal fasteners, pins, plates, or even just nails.
If you look at how the fastening instructions suggest working, it turns out that we can simply drive, for example, a “weaving” nail into a wooden wall and drown part of the nail in the masonry.
This option is possible and fastenings can be made every 50 - 70 cm. The main thing is that all metal parts that will be used as fastenings should be treated with primer paint, which will prevent corrosion.
Almost tiled house
Conclusion
The outer walls of a house built from calibrated logs or timber are unlikely to require any cladding, especially brick. Appearance given construction wood good enough and does not need additional finishing.
In what case is wooden houses facing with bricks, and how to do it correctly? Our short instructions will answer these and other questions.
This rather labor-intensive cladding process, like brickwork, for cladding wooden houses is carried out in three cases:
- The first is when the house is built from low-quality wood: rounded logs or unplaned timber, and the facade looks very unpresentable. The geometry of the walls of such a building, especially, is also far from ideal.
- Brickwork will hide all the imperfections, but it can only be done after the house has settled. The main thing is to provide for the required width of the foundation during the construction process so that you don’t have to top it up later.
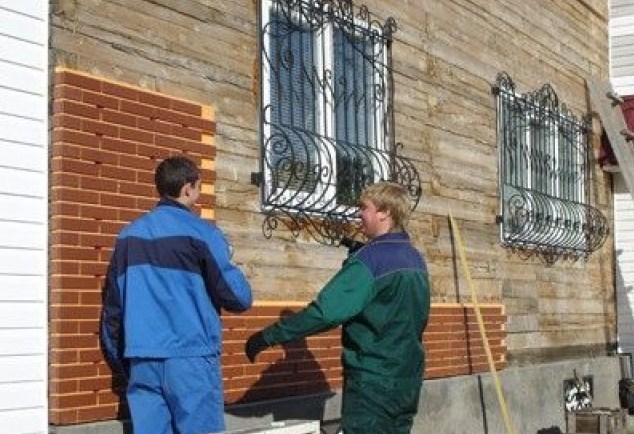
- In the second option, it could be a frame-panel house. Its external cladding is usually designed in advance, and the façade cladding wooden house brick is performed during its construction. Such a house does not shrink much.
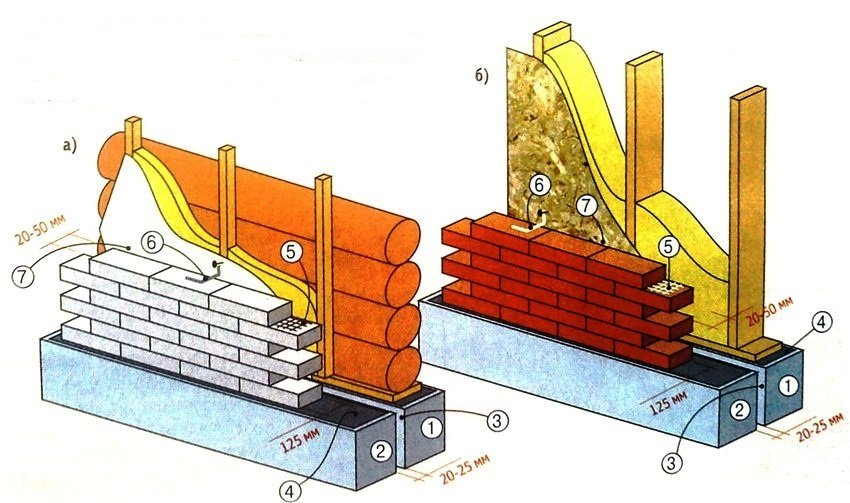
- The photo above shows the cladding schemes for both options. The third, and most common case, is when a wooden house is quite old, and it requires not so much beautiful finishing as strengthening the rigidity of the walls.
- In this case, only brick cladding of wooden walls of houses can solve such a problem, so the fact that the cost of finishing can exceed the cost of the walls does not matter. Your home will be renovated and will last for many more years.
- And yet, there is one “but” that may be a factor preventing such finishing of an old wooden house. These are too small eaves overhangs. The brick cladding of a wooden house, taking into account the size of the gap, will end up directly under the edge of the overhang, and rainwater will get behind the cladding, not to mention its surface.
- In this situation, the cladding will not last long; it will have to be frequently treated with hydrophobic impregnation. If the house has roof overhangs of more than 35 cm, you can safely begin cladding.
You can carry out the update yourself, and we hope that we can tell you how to do it correctly and where to start. But we also recommend watching the video, because visual perception helps to better assimilate the information.
Preparation for cladding
First of all, you need to understand the foundation design. Brickwork can rest either on the foundation itself (if it is strip or monolithic) or on the walls of the base.
So:
- Consider yourself lucky if the basement in your house is higher than ground level and protrudes beyond the plane of the walls by twenty centimeters. In the old days, such a base was called “zavalinka”. It can be produced brickwork, and even with insulation.
- Why exactly 20 cm? This distance is made up of the width of the brick, the thickness of the insulation and the size of the ventilation gap (12+4+4 cm). Only with such a plinth design can brick cladding of a wooden house be carried out with the masonry resting on it.
- Wooden houses are quite often built on a pile foundation. The distance over which the piles protrude from the ground is often simply covered with a false base, the role of which can be played by corrugated sheets, flat slate, or moisture-resistant plywood.
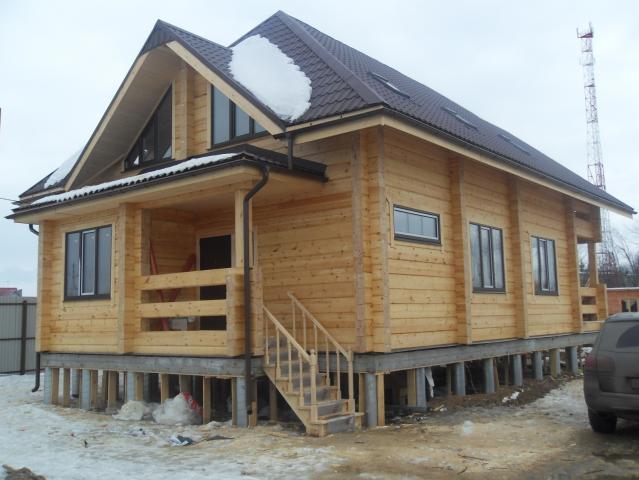
- Your task is to remove all this and make a shallow gravel around the perimeter of the house. strip foundation, on which the masonry can then be supported. To do this, cut a groove 20 cm wide and 30 cm deep.
- Along the perimeter of the recess, knock down formwork from unedged boards, the height of which should correspond to the distance from the ground to the lower crown of the house.
- Pour a 5 cm layer of sand, tamp it down and cover the bottom with roofing felt overlapping the walls. Next, fill the formwork halfway with M300 concrete and compact it.
Then, lay the steel reinforcing mesh, after which you add the rest of the concrete. - After a few days, the formwork can be removed, but further work will have to be postponed for 28 days. This is how long it takes concrete to gain strength.
Only after this can the construction of a wooden house with bricks be started.
Almost the same thing will need to be done if the foundation of the house is not piled, but strip, only in this case the foundation will have to be dug up and topped up at its depth. In the case of pile foundation, the basement wall can also be built from brick, but the concrete option is still preferable.
Construction of a decorative wall
We have already mentioned that there should be a gap between the brick cladding and the wall. But the presence of insulation is not necessary.
Whether there is a need to insulate the facade or not, it’s up to you to decide:
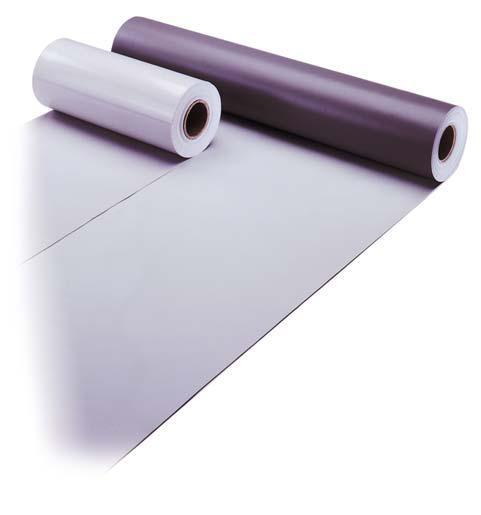
- If not, then the base for the masonry support can be reduced, and be not 20, but 15 cm. But the waterproofing layer needs to be installed. In the case of wooden walls, the best choice would be a rolled membrane.
- The brickwork is necessarily tied together with the wall of the house. For this, flexible connections are used, that is, anchors, but not rigid ones, but made of galvanized wire or polymers.
Flexibility allows the masonry not to be disturbed by uneven ground settlement, and to maintain its geometric position. - As a rule, four connections are installed per square of a solid wall. But if it is produced, then the pitch between the anchors may vary, depending on the type of insulation.
Additional anchors are installed along the perimeters of door and window openings, and in the corners of the building.
- The hard end of the anchor is driven into the tree, and the second end will be embedded between the masonry bricks. It turns out that every fourth row of masonry is reinforced with anchors, with a horizontal step of one meter.
Brick cladding of the walls of a wooden house is usually done one brick thick, and it can be laid either flat or on edge. - Before starting masonry, the foundation base is covered with roofing felt. Laying the brick begins from the corner, guided by a stretched cord.
The entire subsequent masonry depends on how even the first row is. The horizontalness of the masonry is checked using a building level.
So that air can circulate freely between the cladding and load-bearing wall, in the lower rows of the masonry, special holes are made, which are called “vents”. To do this, the vertical seams are not filled with mortar every two bricks.
The same gap (about 1 cm) is left at the end of the masonry, under the roof. In fact, you will end up with a ventilated façade.
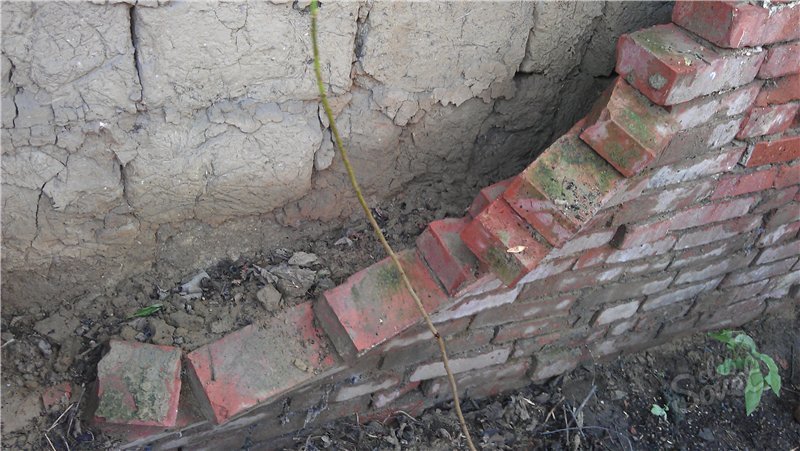
Adobe houses have excellent thermal insulation properties, however, they quickly settle and lose their aesthetic appearance. In order to extend the life of adobe houses, preserve the structure and prevent complete destruction of the structure, the walls are reinforced with bricks. How exactly the technological stage occurs, we look further.
Before you start construction work, draw up a construction estimate in which you carefully calculate the quantity and type of building material needed. So, in any case, each of the components presented below will be needed when facing walls with brick. Construction materials and tools for working with the cladding of an old house: bricks, cement, sand, insulation, water, plumb line, level, bucket, shovel, concrete mixer (you can mix the masonry mortar by hand, then you will need a spacious trough). If you are deliberately constructing a house from adobe, after construction, allow the walls to settle (naturally) and settle for several years to further strengthen and protect the foundation. Over such a period of time (3-4 years), the walls will be sufficiently strengthened and will be ready for further action.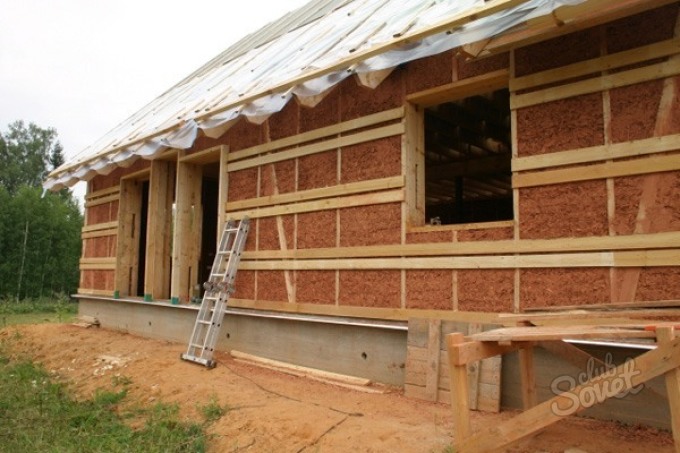
- It is necessary to drill holes with a diameter of 12 mm and a depth of 100 mm into concrete (or 200 mm into brick) with a downward slope of 15-20 degrees;
- 12 mm reinforcement is immersed in the holes made. The remaining 150 mm length should extend to the surface of the foundation;
- Pour a new foundation 30 cm deep and leave the anchors in the concrete;
- You perform waterproofing from a two-layer roofing material.

![]()
Consider the ventilation system and do not place bricks close to the walls, leave space for air exchange. The inability to ventilate the walls will lead to their rapid destruction, dampness, and the spread of mold and mildew.

Building and renovating a home requires a lot of expenses. Drawing up an estimate will allow you to accurately calculate the quantity and cost required material. Plan your expenses. When buying bricks, keep in mind a stock of at least 500 pieces. additionally. Anything can happen, but you won’t lose the building material; in extreme cases, use it for another need.
When the house is finally built, you need to think about how its wooden walls do not lose their presentable appearance. Typically, due to weather conditions and time factors, the wood takes on a duller and darker shade. In addition, the log or beam loses its heat-protective functions, which appear due to the appearance of cracks.
For this reason, there is a need for finishing cladding of the house. Plaster, tiles or facade panels are used as acceptable materials, but brick most often becomes the leader among external wall cladding.
Types of facing bricks
Used for home decoration various types bricks Each has its own manufacturing technology, as well as characteristics and cost:
- Ceramic facing brick is considered the most affordable. It has practically no significant disadvantages except that it is characterized by increased hygroscopicity. When purchasing it, you should focus on the fact that any excess moisture must be removed independently. As for frost resistance, for high-quality bricks it ranges from 25 to 75 cycles and, accordingly, a brick with an index of 25 will be much cheaper than its counterpart with 75. This can be explained by increased manufacturing costs.
- Cladding a wooden house with brick can be done using a hyper-pressed or non-firing option. The manufacturing technology of this type of cladding is based on pressing, and not on the usual firing, and the composition of the brick is in this case has a maximum amount of lime and a minimum amount of clay. Due to the fact that the technology involves the use of pigments and fillers in the manufacture of bricks, a wide variety of colors and shades are allowed. Unlike its ceramic counterpart, this type has a declared frost resistance of 75 to 150 cycles.
- You can also clad a house with clinker bricks, especially since it is a type of ceramic brick. Due to the special form of manufacture, clinker brick has the ability to practically not absorb moisture, and its level of frost resistance significantly exceeds previous analogues and ranges from 100 to 150 cycles. Covering a wooden house with this type of brick is one of the most attractive. The only negative is that this pleasure is not cheap.
Rules for the construction of brickwork
In order to build walls made of facing bricks, you can invite professional masons. If there are not enough funds or there are other reasons, you can do everything yourself, but since this work is responsible, you must follow a number of mandatory rules:
Any wooden house should be covered only horizontally from bottom to top. During work, you must have a level and a plumb line at hand.
The masonry mortar must be made in the exact proportions of 9-2-1 from limestone sand and cement. After thorough mixing, preferably in a concrete mixer, it can be used. As for the consumption of the mixture, when laying 14 mm, approximately 170 kg of mixture undiluted with water is consumed per 90 square meters of area.
When cladding a house, it is extremely important to connect wood with brick. Usually both walls are connected with galvanized pins, but wire or large nails are quite suitable. It is necessary to connect the walls according to the technology: horizontally every meter, and vertically on every fourth brick.
An equally important point is when there is a full calculation of the materials used, for example, 50-55 bricks are usually used per 1 square meter. Based on this, it is enough to simply estimate in advance how many facing bricks may be needed.
Again, when purchasing the most ordinary brick, you need to take into account the fact that it will have to be plastered, and this is another item in construction costs.
It is much more relevant and productive not to do unnecessary work, but to cladding the house using a cladding analogue, which is not only lighter, which simplifies the laying process itself, but also more attractive.
Brick foundation in a wooden frame house
Some people ask questions about what kind of houses are allowed to be lined with brick, and in particular frame houses. In fact, finishing frame structures using this method is the most relevant, because in this house the only structure made of wood is essentially filled with insulation and, in addition, is covered with special cladding.
Any frame structure has a multi-layer structure, which contains protective functions in the form of wind protection and vapor barrier. Due to this:
- In buildings with frame technology construction, there is no formation of condensation during cladding and for this reason there is no need to take additional measures for protection. The only downside can be that any frame structures are most often installed not on a monolithic foundation, but on point supports or on piles.
- What is also noteworthy is that due to the fact that any frame wooden building is very light, this gives the advantage of not installing channel piping. It is enough to lay it out of ordinary timber. But for brick cladding everything is completely different. Therefore, due to the need for reliable support, it is carried out by constructing the foundation.
A slightly recessed concrete strip is allowed as such a foundation. In some cases, metal piles are used. It is clear that all this requires new investments, but how to properly cover a wooden house with bricks if you do not adhere to technology?
Pros and cons of cladding a wooden house
If you compare all possible combinations and, accordingly, the characteristics of materials, you can get a completely ambiguous answer. As for really positive aspects then these include the following:
- A house lined with bricks is less fire hazardous.
- Due to the additional wall, heating costs are significantly reduced.
- The log or beam becomes protected from direct sunlight and exposure to atmospheric phenomena.
As for the disadvantages, there are many more of them, but everyone makes their own decision based on preferences:
- In order for the microclimate to be positive, vapor permeability must change from less to greater. That is, from the inside out. When cladding a house from a wooden frame, everything happens exactly the opposite, which is why moisture appears in the wall insulation. Accordingly, when cold weather sets in, it freezes, and as a result, the insulation loses all its properties. With the onset of a warm period, negative aspects such as the occurrence of rot and mold appear. In this case, the situation can be corrected only by installing ventilated cladding.
- In addition, any wooden structures change in size every year and for this reason the use of a rigid ligament is not allowed. That is, both the cladding itself and the wooden walls must move independently, independently of each other.
From all of the above, some may not take them into account, while others will decide to draw objective conclusions that such a solution is not ideal. Sometimes you should take your time and weigh everything in advance. Especially if the construction of a house is only on paper.
It is, of course, possible to clad a wooden house with brick, but it is advisable to do this with those buildings whose wood has already faded, the house itself has aged and needs a more attractive appearance.
Video: facing a brick house with bricks
 Enzyme preparations (pepsin, trypsin, pancreatin, lidase, streptoliase, etc.
 Cod liver salads: recipes with photos
 Wild duck shulyum: recipe